I love it when a company has kits available that give you everything you need to have a great manicure. Today I have a new favorite - the Dazzle Dry Mini Kit with High Velocity Red - a red with a slight violet shimmer that can make you conquer any Monday.
The Mini Kits come with a 0.25 fl oz vial of Nail Prep, a 0.17 fl oz/5 mL bottle of Base Coat, Color (High Velocity Red for this package) and Top Coat along with very detailed instructions. First you are told to prep your nail. You can gently buff using a 240 or finer grit buffing block (I prefer my Tweezerman one) if you feel necessary. Next wipe each nail thoroughly with the Nail Prep. Your cotton pad needs to be wet/saturated, not just damp and some nails may need to be wiped twice. Surprisingly, this is NOT a dehydrator, like you find with gel polishes. Instead, it's infused with hydrolyzed protein, proVitamin B5 and calcium to strengthen your natural nails. Next is to apply the Base Coat. Now, the very first instruction says that the Base Coat must be clear like pure water before using and if it's not, immerse the bottle (cap closed tightly) in warm to hot water for a few seconds.
Here is my Base Coat straight out of the package and next to the Top Coat to show that yeahhhhh I needed to get some water around that bottle. Now why do you have to do this? Because science.
This is after 30 seconds in warm to hot water (inside of a shot glass). Good enough. So you're to apply the Base Coat generously and completely on the nail, dipping the brush into the bottle before each nail. You're also supposed to wrap the nail tip with Base Coat which is a good practice for ANY manicure. Finally, you're to apply TWO coats of Base Coat. That one is new on me, but I'll do it. I think it's because of all the extra vitamins and good stuff. You will need to wait 1-2 minutes before applying your color - basically when your nail looks matte or isn't sticky/feel wet to the touch. I had to wait a little closer to 4 minutes but I'm also in a whole bunch of sticky humidity here in South Texas. Now for the color. On the first layer, you're told to just use little pressure and get it on your nail - don't go over the same area more than once. Wrap your tips, and ignore any uneven coverage on this layer. Hard one for me to do, but follow directions. Then after you've done all 10 nails (or waited the approximate time), go for your second coat and this time, you can even out but don't over brush and don't forget to wrap your tips. At this point, I was just a little surprised to see that this color appears to be matte or at least it was drying to a matte finish. Finally, apply a generous layer of Top Coat and wrap the tips and wait 5 minutes for your polish to set. I used a small bead of Top Coat on the brush to make sure I was getting plenty on there. If you check out my Snapchat, I actually did a "wipe test" to see if my nails were really dry and THEY ACTUALLY WERE. I'm really pleasantly surprised. Unfortunately, I'm not able to do a wear test this time but they do claim that the longest recorded chip-free wear with natural nails was 5 weeks. Granted, your body chemistry may be different but I am happy if I get 5 days out of nails.
I really like this color. It's a great go to color especially for the office for me. There's just something about red nails. I also really like the idea of the Mini Kit for friends, family, stocking stuffers. There are currently 29 different Mini Kits available on the Dazzle Dry website. Dazzle Dry is available on their website and in select spas and salons across the USA. Join the conversation on social media with Facebook, Twitter, Instagram and YouTube. As a bonus, I had a small sample of Dazzle Dry's Lemongrass Nail Polish Remover with Lemongrass and Clove Essential Oils. I have to say, A+ on the removal - no staining and it's a very nice smell... If you have Nail Butter, it's that same smell! Disclosure:
The product[s] in this post was [were] provided to me by the company
for consideration. For more information, please read this post.
Last month, the Best lil' Nail Show Texas kicked off in Humble, Texas - just north of Houston. I first got wind of the show on social media and found their Facebook page. I asked if I could cover the show as press, and they allowed me to. Now this was a Pro Only - Cash & Carry type show which meant you had to be a licensed professional to get in, but you could buy from any of the booths available and most were offering deep discounts on their products. As media, I got a black band (no jokes on being black listed please) which signified that I could not buy product. My wallet rejoiced, my fingers did not but that's the life of an unlicensed "slightly obsessed with nail polish" blogger sometimes. I have worked with pro-only brands here on PolishGalore but we could talk all day about that topic.
We live about 4 hours south of Houston, so we drove up the day before and spend the night in Houston. Humble is a straight shot north, very easy to get to. When I got there, I had a surprise right at the door!
Yep that's Andrea from Chickettes and Kim from Ten Little Canvases! I met Andrea at Cosmoprof back in 2014 but this was my first time meeting Kim, who lives in Texas! It's always nice to put real faces to the blog.
We were allowed to go in the back door (and skip the crazy long line!) which opened directly to one of my favorites, CND! Y'all know that I have some love for Jan Arnold - she's always been so nice to me, despite the fact that I'm not a licensed professional. But what I was really excited about was the ridiculously crazy display of Creative Play.
That's 80 shades of brand new goodness - think of it as the little sister to Shellac. So you have Big Sister Shellac... 14 days wear, cure with a lamp, soak off. Then you have middle sister Vinylux - 7 days wear, air cure with sunlight, remove with polish remover. This is little sister Creative Play - less than weekly wear, good for retail, no curing, great for changing your polish every few days. Now, don't think that it ONLY lasts a few days - it does last as well as you keep it, but the price point is such that you can buy many bottles at once. The formula is also a little different, but more on that because I got some straight from CND (not from the show!) to play with. The bottom row also has CND's Creative Play Base Coat and Top Coat.
Drool - just shelves of Vinylux to play in.
These were the looks created with the CND Summer 2016 Flirtation collection.
Jan Arnold's look for the show created with AthenA Rocks. The hand showing off the look is from Heather Davis, CND Educator - Heather and Shelena Robinson (another CND Educator) created this look dubbed a #Janicure. More on what Heather had in another blog posting.
So the big excitement at the show was CND's #CutTheCord - they had over 800 lamps ready to give away and it went pretty well. Of course, some people cheated the system, and were caught, but overall it was very civil and people behaved. Now, I assumed this is in response to the Preen.me incident that happened... If you don't know what I'm talking about, Manic Talons had a very extensive write up here.
Being that this was a Pro-Only, Cash & Carry show, there was a lot of things that I wasn't able to fully partake in. Some of the booths were ridiculously busy, and didn't have a media representative to talk to me. Other booths didn't really know how to work around me, as they were helping paying clients. This is much different than Cosmoprof North America - which is a business to business show, no purchasing (although that in itself has evolved too), and media plays a larger role. I hate that I didn't get to talk to some of the bigger brands there like Tammy Taylor or ORLY, but it helps me with a game plan for 2017, if I'm able to return. I did try to start at the front of the show, and make my way down the aisles. Around 1100 people showed up to the ballroom on Sunday - the other show days were filled with technical classes for the licensed professionals, which from what I can see on Instagram, were amazing.
At the front of the show was amazing nail creations in a contest sponsored by 3D Fanatics - a group of Licensed Nail Technicians on Facebook who share their love of 3D Nail Art, founded by Nail Tech Kimberly Harr who was on site judging the creations. The prompt "Stars of Texas" was given, and there were two types of entries - OT were for those who had won 1st Place in the past and GH were the newbies who may have won other places in competitions but never first. I really liked this set about Miranda Lambert which ended up winning 1st Place in the GH (Green Horn) category. SO SMALL WORLD MADE SMALLER. This set belongs to fellow blogger & licensed tech Amber Dunson from AmberDidIt! Amber and I have a mutual friend - Destany from Confessions of a Sarcastic Mom - and Amber found me as I was getting ready to leave the show so we had to take a photo.
The next booth had some celebrities up in the house - don't you dare mess with these nails! It's the Real Nail Qweenz of Texas. These ladies were Fierce, but also very down to earth and lovely. Lena Cole (top), Edith Graham (middle two) and Ayanna Williams gracefully posed for photos for me.
Next on my journey was Bodipure. These single use, waterless, all in one and one time use gloves and socks are enriched with anti-fungal Copaiba Oil, strengthening Keratin, Anti-aging Vitamin E, hydrating Urea and UV protection with Lipex PreAct. They are also "touch screen friendly" so in the salon, you're able to still use your iPhone while wearing the gloves. I think this would be a great product for my nail technician to use because it's a small expense but offers clients a large upgrade in their service.
I also got to see Exclusive Nail Couture by Max Estrada, a professional line of products ranging from gel, powders, removers, lamps, accessories, and equipment. For starters, it's a lot of pink up front, but there's some really neat elements to it as well like the Cotton Candy scented Monomer. This was a pretty busy booth when I went by it but was able to watch a demonstration of the gel - it's a 1 coat system but to show how effective the 1 coat was, 2 coats was used to show that the opacity really was there with just the 1st coat.
At the front doors, I spied Social Claws who had an super blinged out amazing display of SUGAR - these ridiculously sparkly conflict-free nano crystal caviar. She had 3 lab-grown colors available at the show (and on her website) - Pink Aurora, Black Star and White Fire. They are reusable, cleanable, and shine super bright. It was hard to get the bling on camera - seriously. Best part of their company for me? She brings awareness on her Instagram to adoptable animals.
At the next aisle, I was able to speak to proTIPCLIPS, an easy removal system for all types of nail enhancements. Now the big plus here is that the stainless steel and high grade plastic can be cleaned in an autoclave, which is required by some states for salons to use for sanitation of equipment. Kick the foil system to the curb. Now, y'all know I love my Steam Off for my nails, but I couldn't use it on toes so this is where proTIPCLIPS really sold me - there's a set for nails and a separate set for toes that are slimmer and shorter. I know of a few people who would buy these without a second thought. I'm also a sucker for a story and the master nail tech, educator and veteran salon owner, Angela Blaisdell created this product after going through hundreds of dollars in foil wraps for her clients. She tested the final product for over a year before selling to the public and she was busy every time I walked by.
I had a fan girl moment at Crystal Ninja. I've been drooling over Kellie's items since I saw her at Cosmoprof North America last year and she handed me her flip book of products. She is a Swarovski Authorized Instructor and I'm a Swarovski Christmas Ornament Super Fan and just lover of all things sparkly. (Seriously, I'm only missing 3 of the original ornaments but have the rest carefully stored in my house.) I want to buy her Crystal Katana (Mixed Media Pick Up Tool) for my crafty items here at home but as a nail tech? Man, I'm not sure I could do crystal, rhinestone, gemstone placement without one.
I swiveled around the aisle to see Dazzle Dry in action doing a manicure on a woman who looked familiar but I couldn't place her right off.
No big deal, just the NAILS Magazine publisher, Michelle Mullen. But I didn't know that at the time - I started chatting with her and Dazzle Dry about bloggers which led into well, another blog post to come, but overall it was one of those chance meetings where you're just on cloud 9 because you're talking to awesome people about awesome stuff and AWESOME. (Yes, I'm a child of the 80s and 90s,)
So Dazzle Dry - I've seen it advertised in NAILS magazine but I haven't really seen the product before. Turns out it's a very salon prestigious company, with 196 core and 4 seasonal collections (6 piece sets). The shimmers are made with pigments because this is a 6 free, non-yellowing, vegan, no animal testing, YOU NAME IT line. For Dazzle Dry, it's all about science, quality control, and care - care for the product, care for the consumer, care for the earth. They have a great lemongrass remover enhanced with essential oils but wait, there's also a non-acetone version called Vivo'Sol that has spearmint and eucalyptus oils. Their Nail Prep is not dehydrating. They say their top coat is 5 minutes to totally dry. I can literally go on and on. But what really had me excited were these Mini Kits that were available. A great stocking stuffer, Secret Santa, just all around great gift for $20 - the Mini Kit has a Nail Prep, Base Coat, Top Coat and a color. More on that to come.
Dazzle Dry is committed to their product and while they sell to consumers on their website (YAY) and wholesale to salons and spas, you're not going to see this end up in your local drugstore or other brick and mortar store. I have a love/hate with stores because that means you have to find one to go into, but I also like holding product in my hand - like this polish.
I totally didn't get the name of this polish written down and I love it but looking on their website, I can't tell what color it is. Monitors only reflect so much, you know? Speaking of NAILS Magazine, I was so happy to run into Sigourney Nunez, Associate Editor. I met her a few years ago, before she got her professional license, but just hadn't had a chance since to see her. It's always so much fun to run into people who just love nails.
I was able to stop at Essie as well and talk to Gino Trunzo, Director of Education. He did two amazing things - one, he introduced me to the new Apricot Cuticle Peel, which I'm now obsessed with and want to buy immediately. And secondly, he let me try a top secret product which isn't launching for a couple of months. Now, I know that other publications have been given the green light to talk about this delightfully twisted product, but I have not, so sorry PolishGalore readers - you're kept in the dark for now until I'm given the go. Just let me say that Gino was so proud of it - 3 years in the making he said, and I was pretty happy with it too.
I also got to check out the 1000th Essie Shade from the 2016 Shimmer Brights Collection called "Aim To Misbehave". This yellow has a shimmer in it to make it more opaque (because if you read this blog, you know how much I hate yellow because it's normally a streaky mess). I may have to check it out for opaque testing.
I stopped by China Glaze next and you KNOW they are my first love in polish but unfortunately everything was just lined up for selling and no one was really available to talk.
Summer Favorites which still need to come home with me.
Both EverGlaze and Gelaze were available for purchase as well.
While there was still more show going on, we had to head back home and I was starting to get a nasty sinus infection, so I had to say goodbye and head out the doors. Overall, I enjoyed the show and meeting up with the different brands that I was able to, and I look forward to seeing more from the Best lil' Nail Show Texas in 2017!
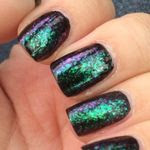
Happy Friday! Today I felt like pulling an oldie - dusty if you will. This is Illamasqua Speckle, a lilac jelly with various sized black glitter. I was OBSESSED with this type of polish when it first came out in 2013 and bought every color. And then like a true addict, it's sat on my shelf just looking pretty. ^_^ I used a base of Duri Rejuvacote, 3 thin coats of polish and finished with KBShimmer Clearly On Top. This polish was a little thin for me on the first coat, and while the second one was better, I felt like I needed a third coat to finish it off. The black glitter can get a little buried by the polish but it's still a great look on the nails.
I ended up wearing this as a full manicure to work. It's one of the more bold looks I've tried at work since I normally end up wearing just cremes or the occasional holo. Did you ever buy any of these? Sadly, Sephora was the only place here in the USA that you could buy Illamasqua, but they have been removed from Sephora's line up. Now, you can purchase Illamasqua directly from their website with only a $7.50 shipping fee (which from England, is pretty fantastic). This polish has been discontinued. Illamasqua [website | Facebook | Twitter | Google+ | Pinterest | Instagram | YouTube] is available through their website for around $18 a bottle.
Do you like crellies? I have a love/hate with them but today I'm pretty happy. From the Spring 2016 KBShimmer collection this is Pools Paradise, a green leaning aqua with pops of neon pink, periwinkle and aqua glitters. I used a base coat of Duri Rejuvacote, 3 thin coats of polish and finished with KBShimmer Clearly On Top. I inverted my bottle for 30 minutes prior to polishing to help the glitters come closer to the brush. It's how I use all my crellies from KBShimmer.
So I have been a fan of this whole teal/green base color for awhile now and the glitters really help to make the polish more interesting. The neon pink gets a little lost but it's still there and still pretty. KBShimmer [website] can be purchased through their website for those in the United States and through Harlow and Co for international sales. Prices range from $5.50 to $9.25. Connect with KBShimmer through their social media networks: Facebook, Twitter, Instagram and Pinterest. Disclosure:
The product[s] in this post was [were] provided to me by the company
for consideration. For more information, please read this post.
Happy Monday! After a ridiculously busy month, I'm trying to wind down and get back to showing you more of the things I love - polish! Especially stay tuned to my Instagram this weekend, because I will be attending the Best Lil' Nail Show Texas! Today, I wanted to wear a red polish that just screams hello to you, and I felt that Morgan Taylor Wish Upon A Starboard definitely does just that! I used a base of Duri Rejuvacote, 2 coats of polish and finished with Love, Angelina "Topped With Love." This blazing cherry creme polish was almost a little squishy on the first coat while still being nearly completely opaque. I opted for a second coat just to even things out. The humidity is RIDICULOUS here in Texas right now, so I had to be careful as the polish was wanting to smear on the second coat but a careful hand and cranking down the a/c and I was good to go. This is also my first time to use this top coat - one I've heard so much about but hadn't used before. Results were good - it's very thin but doesn't smear and dried quickly.
Commanding presence I must say! This limited edition polish is a part of the "A Very Nauti-cal Girl" 2016 summer drop-in collection available this May. You can purchase the full sized lacquer for around $9 or there will be a 4-piece mini pack as well. I'm really excited to use this color again for the 4th of July - I work on a Naval Base now and I already have great ideas going for my manicure because you HAVE to have a great manicure for the holidays! Morgan Taylor [Website | Facebook | Twitter | Instagram | Pinterest | YouTube] is available at CosmoProf for $8.50 a bottle. Online, non-professionals can purchase Morgan Taylor atUlta Beauty. Disclosure:
The product[s] in this post was [were] provided to me by the company
for consideration. For more information, please read this post.
Happy Saint Patrick's Day! How do you celebrate today? I don't necessarily do anything special but I try to at least wear green. Polish My Life 1950s Mint 'Fridge is a perfect mint green creme to end this 7 Days of St. Patrick's. I used a base of Duri Rejuvacote, 3 coats of polish and finished with Glisten & Glow H K Girl top coat. I had hoped this would have been plenty opaque in 2 coats but I really needed the 3rd. What I love about this polish is that it has this teeny tiny silver shimmer added in that you don't see while wearing but it just adds to the shine of this polish. This is from the All Things Vintage collection that I picked up last year. If I recall correctly, you are supposed to double up on base coat to ensure none of these polishes stain because of the heavy creme pigment but I didn't have any issues with just my normal Duri Rejuvacote (one coat).
I LOVE this color. I wish my parents were still around so I could ask them if they knew anyone with this color of fridge because it screams the 50s to me. I can definitely see myself wearing this more and I'm seriously considering it for my pedicure. It's just bright and happy. Fair warning, this polish is currently sold out. Polish My Life has closed and is no longer available for sale.
Today in my series of greens I have Zoya Tiana from the Delight collection. This is a nice pastel mint green creme that reminds me of Easter. I used a base coat of Zoya Anchor, 2 coats of polish and finished with Zoya Armor. I don't have as quick of drying time with Armor, so be sure to make sure and let all layers dry before moving around. I don't recommend using a different base or top coat with Zoya as their formulas all work in harmony with each other. Every time I've tried to wear a Zoya manicure with a different base or top coat, I get shrinkage, lifting or just general messy stuff going on.
This is definitely a lighter green with no staining thankfully. It isn't really yellow based but more of a straight mint which I like with my skin color. I did have a little bit of clean up necessary but it worked well. Zoya [Facebook | Twitter | Pinterest | Instagram | YouTube] can be purchased on their website for $10/bottle.
Glitter topper polishes - love them or hate them? Either way, they are an instant way to get nail art to your nails. Today I have Sinful Colors Feeling Lucky? a limited edition polish in stores now. This polish has bright green microglitter in 2 sizes, lime green round glitter and gold 4 leaf clover glitter all suspended in a clear base. I decided to layer one coat of Feeling Lucky? over JulieG Gelato in Venice. The microglitters and round glitter applied properly but I had to fish around for a gold 4 leaf clover that I placed on my ring finger. Unfortunately, my ring finger is more curved than I thought so the glitter stuck up and caught on everything before peeling off. I topped all layers of polish with Glisten & Glow H K Girl top coat.
I really like how well the different sizes of glitters play off each other and how well they applied in one coat. My only downfall was using the 4 leaf clover on my ring finger instead of my middle finger (which is more of a flat nail). Sinful Colors is available at major drug and mass market stores nationwide for $1.99, or online at www.sinfulcolors.com. Join the conversation on Facebook, Twitter, Pinterest, and Instagram.
Disclosure:
The product[s] in this post was [were] provided to me by the company
for consideration. For more information, please read this post.
I have a soft spot for neons - I love them to pieces but I don't wear them nearly enough. I purchased the Girly Bits "Hoop! There It Is" collection but haven't put them on so today, let's change that! This is It's Hoop to be Square. I used a base coat of Duri Rejuvacote, 3 coats of polish and finished with Glisten & Glow H K Girl top coat. This polish does apply smoothly but I did see a couple of bald spots where the polish pulled on itself. Also this is a very yellow based (lime) green neon but thankfully, no staining. Also in my photos you can see some white pigment at the bottom of the bottle. It's just pigment being pigment - nothing to effect the actual polish formula or wear.
Another hot neon! No white base on this polish either but it's not needed. Just major eye burning colors. Girly Bits can be purchased on her website or through her approved distributors.
Prices range from $10 (USD) to $12 (USD). Join the
conversation on Facebook, Instagram, Google+, Twitter, & Pinterest.
Today I have a wickedly good green for you - from the Ghouls' Night Out collection from China Glaze, it's Drink Up Witches which is such a great pun. This neon green polish leans more yellow green but thankfully, no staining. I cannot deal with stainers right now. I used a base coat of Duri Rejuvacote, 3 coats of polish and finished with Glisten & Glow H K Girl top coat. Now neons are normally matte by nature, but this polish seemed shiny even without the top coat. I added it for protection of course. As for the formula, it was a little thin, and that's why I needed 3 coats and then I had to be sure not to bubble it up on the nail, as the formula wanted to run down the brush and glob on. China Glaze can be hit or miss on some of their formulas and this was definitely a watery one.
I did not use a white base coat on this polish but just LOOK and see how it glows! I'm a little messy - my right hand is in a wrist brace for now, so polishing is a little difficult, but you can always clean up with some polish remover and a small brush. I'm still using my trusty e.l.f. "concealer" brush that I got for $1, but I can't seem to find it in stores anymore so I hope it lasts a good long while. This one has lasted over a year. Back to the polish - it's just eye searing greatness. China Glaze [Website] [Facebook] [Twitter] [Instagram] can be found online through several etailers, including my favorite Head2Toe Beauty, Sally's Beauty Supply as well as TransDesign.


